
There is various accounting software which are well known, but QuickBooks has surpassed them all. QuickBooks offers different features to ease the work of accountants and businesses. The multi-user network feature is one noteworthy one which needs special elaboration.
This feature helps improve productivity by allowing many QB users to work simultaneously on the same piece of work - the Company file. In this article, we will discuss how to set up a multi-user network in QuickBooks.
What is a multi-user network?
Multi-user mode allows uses to work on the same company file simultaneously. This feature helps save time. It makes things quicker to finish. If you have a large firm, you should definitely take up the multi-user mode option as it can help perform operations easily and in the least time possible. However, you will need a licensed copy of QuickBooks in your system.
How to set up a multi-user network on a QuickBooks desktop?
Checkout the following steps to setup the multi-user network on a QuickBooks desktop:
Step 1: Download and install QuickBooks desktop
- Either use the CD or download QuickBooks from Intuit.
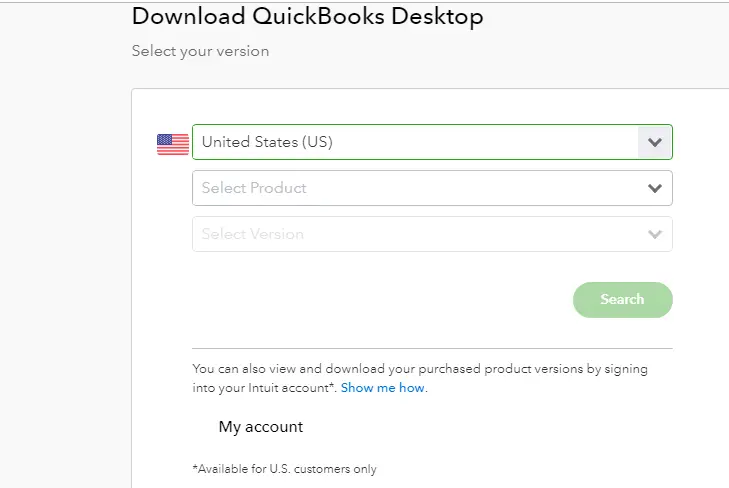
- Heading forward, run the installer.
- You now have to opt for “custom and network install.”
- Later on, hit a click on “I’ll be using QuickBooks desktop on this computer, and I’ll be storing.
- Now finalize the installation.
Step 2: Switch to multi-user hosting
- Under this process, you need to open QuickBooks software.
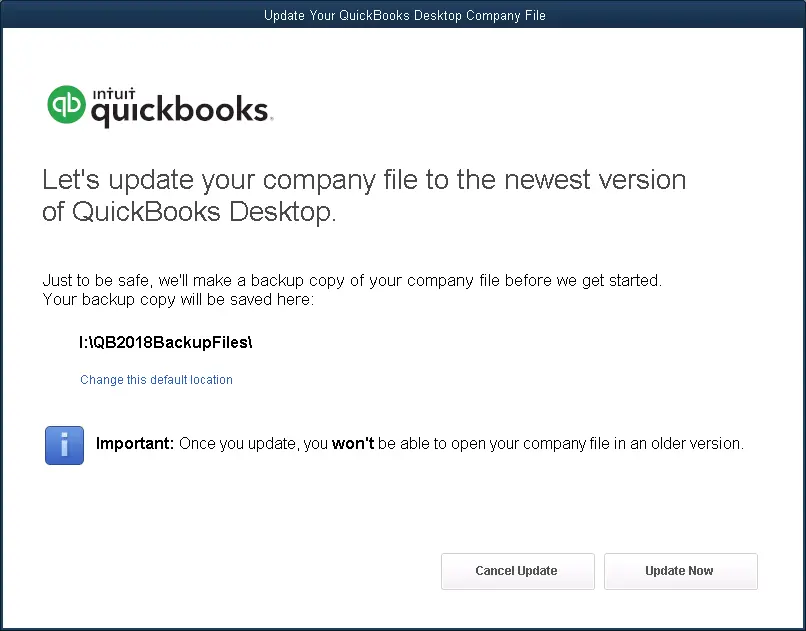
- After that update QuickBooks desktop file to the latest version.
- Once done with that, go to File menu Utilities Host multi-user access.
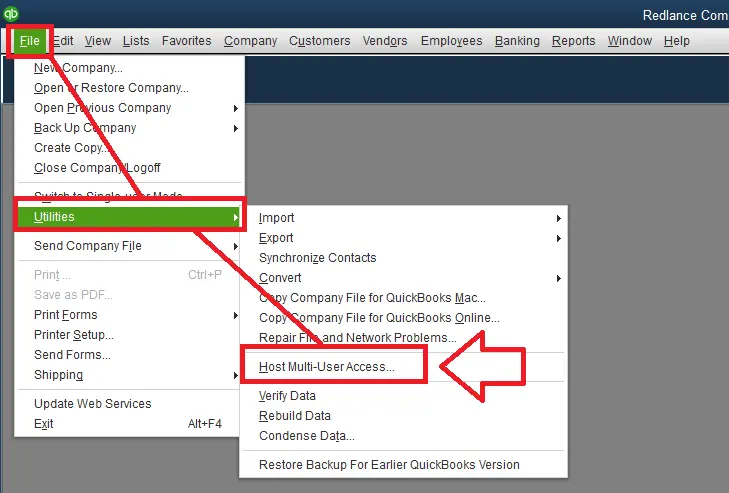
- Lastly, go to the next step if the last hosted multi-user set up is present.


