


 Pro Benefits

 الشروط
 الخصوصية
 Child Safety & Protection
 الإشعارات
 Ayrush Global It Services Pvt Ltd
Inside a Dust-Controlled Ceiling Project: What the Week Actually Looks Like
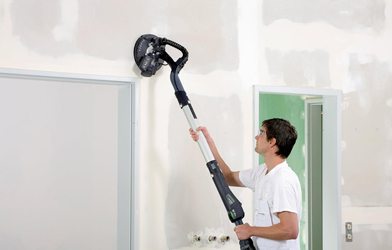
Homeowners considering this work almost always want the same thing: a realistic picture of what happens inside their house, hour by hour, so they can plan around it. Quotes rarely provide that. What follows is the sequence a properly run project actually follows, and the reasons behind each stage — because the steps that seem like overhead are usually the ones protecting the rest of your home.
Before Anyone Arrives
Two things should already be settled: the lab result confirming what the ceiling is made of, and a written scope covering which rooms, which finish, and who is responsible for moving what.
You will be asked to clear surfaces, remove wall art, and take down window treatments. Furniture that can leave the room should leave. Anything remaining gets consolidated to the centre and sealed.
Day One: Containment and Protection
This stage takes several hours and produces no visible progress on the ceiling, which occasionally frustrates homeowners. It is also the difference between a contained project and a house full of drifting dust for three weeks.
Isolating the work zone
Doorways are sealed with polyethylene sheeting and zippered access panels. Floors are covered and taped at the perimeter. Baseboards, trim, and any surfaces staying in place get masked.
Managing air movement
HVAC returns and supply registers in the work area are sealed, and the system is typically shut down for the duration. This single step prevents the most common failure in ceiling work — dust entering the ductwork and reappearing throughout the house every time the furnace runs.
Air scrubbers with HEPA filtration are set up to maintain slight negative pressure inside the containment, so air flows in rather than out. Fine particulate that does become airborne is captured rather than escaping into hallways.
Fixtures and electrical
Light fixtures, ceiling fans, and vent covers come down. Circuits are isolated where needed. Openings get sealed so nothing falls into wall cavities.
Day Two: Removal
Wetting the surface
Texture is misted with water and allowed to absorb. Damp material releases as a soft solid rather than a cloud, which is the entire reason wet methods dominate this trade.
Wetting is done in sections and repeated. Rushing this step is what produces the dust storms popcorn removal is notorious for.
Scraping
Wide, flexible blades work across the surface at a shallow angle, taking the texture off without gouging the substrate underneath. Debris is collected continuously rather than accumulating on the floor.
The pace is slower than people expect. Careful scraping preserves the paper face of the drywall, and a torn paper face means significantly more repair work later.
Crews handling dust-controlled Popcorn Ceiling Removal Toronto projects in occupied homes typically work room by room rather than opening up the whole floor, so containment stays manageable and families retain usable space throughout.
First look at the substrate
With texture gone, the real condition of the ceiling becomes visible for the first time — old seam tape lifting, nail pops, hairline cracks, patched sections from previous work, and occasionally evidence of a historical leak.
This is a normal part of the process. A good contractor will show you what they have found and explain what it means for the finish.
Day Three: Repair and First Coats
Substrate correction
Loose tape is cut out and replaced. Nail and screw pops are reset and covered. Cracks are treated according to their cause rather than simply filled. Damaged sections are cut back and patched with new board where necessary.
Skipping this stage is the most common shortcut in the trade, and it shows within a year as cracks reappear through a fresh finish.
Skim coating begins
Achieving a genuinely flat ceiling requires multiple thin coats of compound rather than one heavy application. The first coat fills and levels. Each subsequent coat refines.
Between coats, the compound must dry fully. This is why the calendar cannot be compressed indefinitely — humidity, temperature, and coat thickness all affect drying, and a coat sanded before it cures will fail.
Day Four and Five: Refinement
Sanding
Sanding is where the finish is actually made, and it is the dustiest stage of the project. Vacuum-assisted sanding equipment captures the majority of particulate at the source, with air scrubbers handling the remainder.
Work lights are held at a low angle across the surface, because raking light reveals imperfections that overhead lighting completely conceals. Areas that look flawless under a ceiling fixture will show every ridge under a work lamp.
Additional coats as needed
Most ceilings need two to three coats. Older ceilings with significant substrate issues may need more. Any contractor who quotes a single coat on a previously textured ceiling is describing a different, lesser outcome.
Final Stage: Priming, Painting, Reinstatement
Primer seals the compound and creates a uniform surface for paint. Applying finish paint directly over bare compound produces patchy, uneven coverage — the joint compound absorbs paint at a different rate than the surrounding surface.
Two finish coats follow, typically in a flat or matte ceiling paint. Flat sheens scatter light rather than reflecting it directionally, which is why they conceal minor variation far better than eggshell or satin.
Fixtures go back up, vents are reinstalled, and containment comes down last — only after the space has been cleaned, so nothing is released while removing barriers.
The walkthrough
Inspect the finished ceiling with a light held at a low angle, not just from the middle of the room. Look along the length of the surface. Check the perimeter where ceiling meets wall, and check around fixture openings.
Raise anything you notice before the crew leaves. Touch-ups are straightforward while equipment is still on site and considerably less convenient afterward.
What Determines the Real Timeline
A single average room, in good substrate condition, with no asbestos, typically runs three to five working days including drying time. Multiple rooms extend that. Significant repair work extends it further. Regulated abatement extends it substantially.
The variable homeowners most often underestimate is drying time between coats, which cannot be rushed without compromising the result.
Judging the Work by the Setup
If you take one thing from this sequence, let it be the importance of day one. Homeowners naturally focus on the scraping and the finish, but the containment, the sealed ductwork, and the air filtration determine whether your home stays livable during the work and clean afterward.
A crew that spends half a day protecting your house before touching the ceiling is a crew that understands what it is doing. That first afternoon of apparently invisible progress is the best predictor of how the rest of the week will go.
 Arabic
 English
 French
 Spanish
 Portuguese
 Deutsch
 Turkish
 Dutch
Dutch
 Italiano
 Russian
 Romaian
 Portuguese (Brazil)
 Greek
Greek
