


 Pro Benefits
 About
About
 Koşullar
 Gizlilik
 Child Safety & Protection
 Bildirimler
 Ayrush Global It Services Pvt Ltd
AWS SQS and SNS Node JS tutorial: Integrating AWS SQS and SNS in a NestJS Application with TypeScript
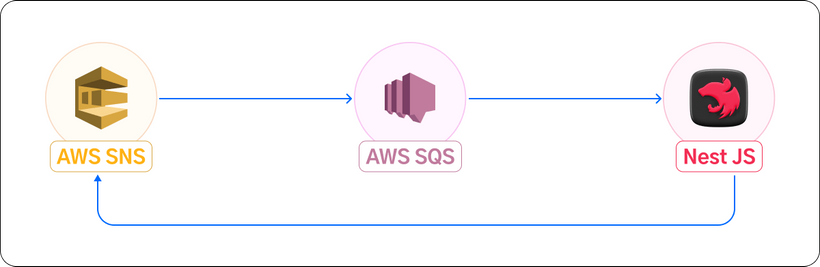
In microservices architectures, AWS SQS and SNS are essential services for connecting and managing communication between distributed systems. In this blog post, we will guide you through setting up AWS SQS and AWS SNS in a NestJS project using TypeScript. You’ll also learn how to use the SNS fan-out pattern to broadcast messages and subscribe to those messages using SQS.
Additionally, you will get the full setup, including SQLite database integration to save processed messages and SQS polling to automatically process and manage messages from the queue.
SNS Fanout Pattern:
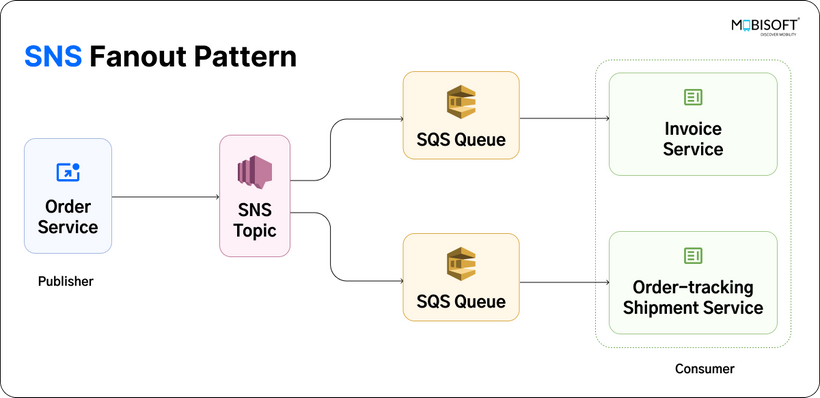
The SNS fan-out pattern is a mechanism through which a single message is sent to multiple subscribers. Instead of sending separate messages to each subscriber, a message is published to an SNS topic, and multiple subscribers consume it through SQS or other supported endpoints.
For example, consider a scenario where we have an Order Service, Invoice Service, and Order-Tracking Shipment Service. When a message is published to an SNS topic, such as order-created, by the Order Service, other services can listen to the message through SQS and begin processing it.
-
The Invoice Service will generate an invoice for the order.
-
The Order-Tracking Shipment Service will initiate order tracking and shipment.
This allows for efficient and decoupled message handling across multiple services.
Setting Up a NestJS Project with SQS and SNS.
Prerequisites
1. Basic understanding of NestJS.
2. An AWS account.
3. Familiarity with SQS (Simple Queue Service) and SNS (Simple Notification Service).
4. Node.js installed on your system.

Step 1: Setting Up NestJS
First, create a new NestJS project:
npx @nestjs/cli new nest--project
Follow the CLI prompts to complete the setup.
Step 2: Install Required Dependencies
1. Navigate to the project Directory
cd nest-project
2. Install the AWS SDK modules for SQS and SNS, along with other necessary packages:
npm install @aws-sdk/client-sns @aws-sdk/client-sqs
3. Install additional dependencies for SQS polling and database support:
npm install sqs-consumer @nestjs/typeorm typeorm sqlite3
4. Install other dependencies
npm install @nestjs/config uuid dotenv
Step 3: Configure Environment Variables
Create a .env file in the root of your project and add your AWS credentials:
AWS_ACCESS_KEY_ID=<your-access-key-id>
AWS_SECRET_ACCESS_KEY=<your-secret-access-key>
AWS_REGION=<your-region>
SNS_TOPIC_ARN=<your-sns-topic-arn>
SQS_QUEUE_URL=<your-sqs-queue-url>
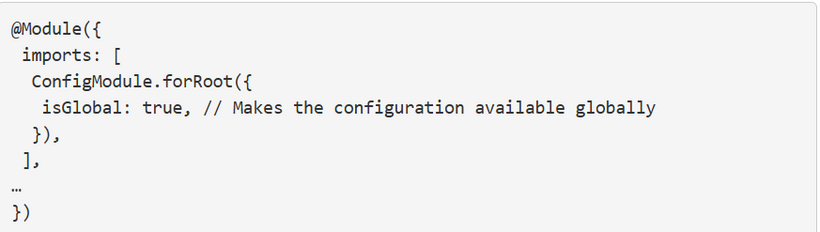
Load these variables globally using NestJS's ConfigModule, and update imports in app.module.ts
Step 4: Set Up SQS in AWS
1. Create an SQS Queue:
1. Log in to the AWS Management Console.
2. Navigate to the SQS service.
3. Click on Create Queue.
4. Choose either a Standard or FIFO queue based on your needs.
5. Configure the queue settings (e.g., name, visibility timeout).
6. Click Create Queue.
For more details, refer to the Amazon SQS Documentation.
Step 5: Set Up SNS in AWS
1. Create an SNS Topic:
1. Navigate to the SNS service in the AWS Management Console.
2. Click on Create topic.
3. Choose either a Standard or FIFO topic based on your requirements.
4. Enter a name for your topic and configure additional settings.
5. Click Create topic.
2. Subscribe to the SQS Queue to the SNS Topic:
1. Navigate to your SNS topic.
2. Click Create Subscription.
3. Choose Amazon SQS as the protocol.
4. Enter the ARN of your SQS queue.
5. Click Create Subscription.
6. Add permissions to allow SNS to publish to your SQS queue.
For more details on SNS, check out the Amazon SNS Documentation.
Step 6: Configure SQLite database in NestJS:
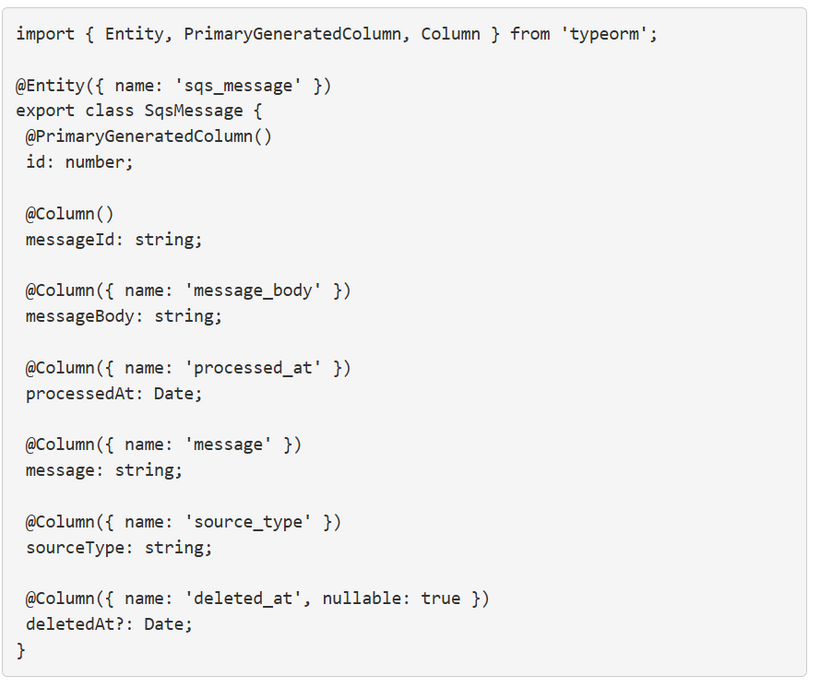
1. Create the SqsMessage Entity:
Define the SqsMessage entity in sqs/models/sqs-message.ts:
 Turkish
 English
 Arabic
 French
 Spanish
 Portuguese
 Deutsch
 Dutch
Dutch
 Italiano
 Russian
 Romaian
 Portuguese (Brazil)
 Greek
Greek
